Export photos from Google Photos and import into Immich
After installing and configuring Immich, I needed to import the photos I had from Google Photos into Immich.
Fairly simple to do, but depending on the size of your photo collection, it might take a while to process all of your photos after importation.
Export photos from Google Photos
While Google does not make it easy to leave their ecosystem, they do allow you to export your data, including your photos.
Browse to: https://takeout.google.com/
Select Deselect all, then scroll down and check off Google Photos

Scroll down to the bottom and click the Next Step button
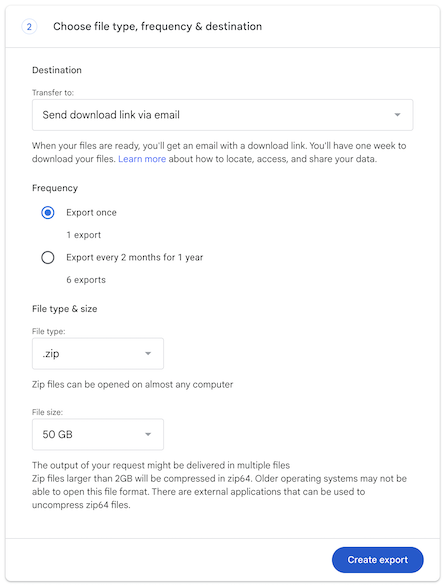
Under Choose file type, frequency & destination
Frequency : Export once
File type & size :
File type : .zip
File size : 50 GB
Then click Create export
You will get an email from Google, informing you that your Google Takeout is ready. Depending on the size of your photo collection, that email might show up in a few minutes, or a few hours.
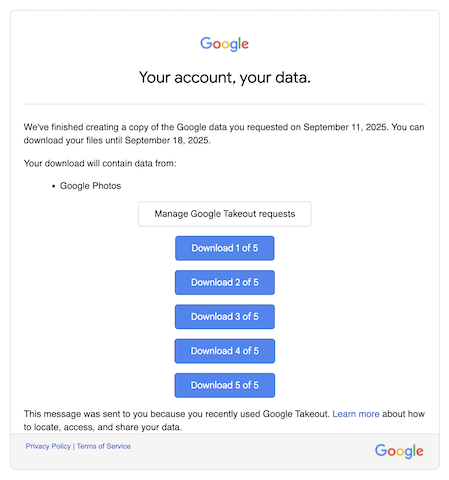
Download the file(s) from Google Takeout.
You do not need to extract the files!
Import Google Photos takeout into Immich
After downloading the file(s) for your Google Photos from Google Takeout, we'll use immich-go to import them into Immich.
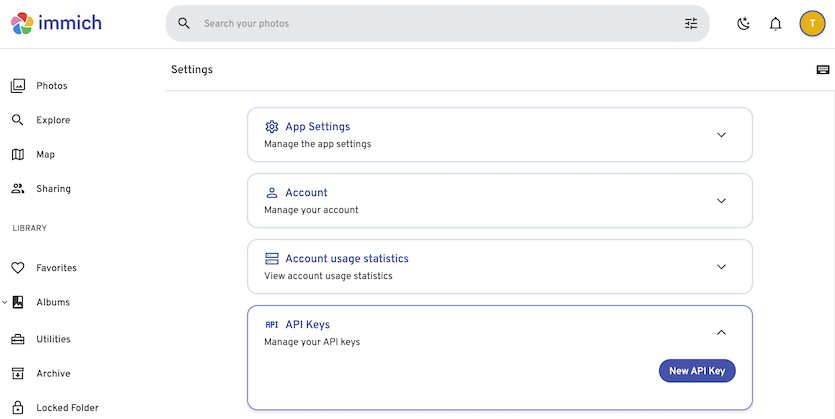
Generate an API key in Immich
To generate an API key for our Immich user:
Account settings >>> API Keys >>> New API Key
Under Permissions, check off Select all
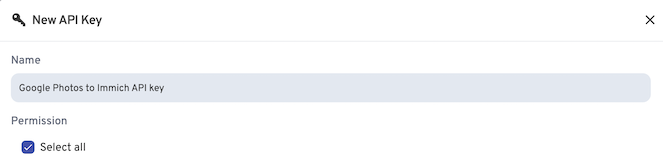
You could use less than Select all, and you should, if you're providing some sort of service to people you don't fully trust. See https://github.com/simulot/immich-go/discussions/1032 for details.
However, in my case, it's just family, and close friends, plus once the API key is used to import the photos, I delete the key...
Download pre-built binary of immich-go
-
Browse to https://github.com/simulot/immich-go/releases and download the pre-built binary of
immich-gofor your operating system (I grabbed the one for 64-bit Linux). -
Extract the
immich-gobinary from the download. -
Move the
immich-gobinary to the same folder as your Google Photos takeout zip files. -
Verify that
immich-goworks:
./immich-go --version
immich-go version 0.27.0
Start the import
If you are doing this on a remote server, I would highly recommend using something like tmux so the import doesn't stop if you get disconnected.
Assuming that the immich-go binary and the Google Photos takeout zip files are in the same directory, start the import:
./immich-go -l immich2.log upload from-google-photos \
--server=http://immich.nodinrogers.com:2283 \
--api-key=DaTyc238hu2V5Dmq9dkMKQHZ9mYGG9AtmG4Vg7dFyaM \
./takeout-2025*
Details on the above command:
- immich-go - binary used to import photos
- -l immich2.log - the -l specifies logging, and immich2.log is the name of the log file
- upload from-google-photos - pretty self explanatory
- --server= - the IP (or hostname) of the immich server
- --api-key - the API key we created above
- ./takeout-2025*.zip - name(s) of the Google Photos takeout files
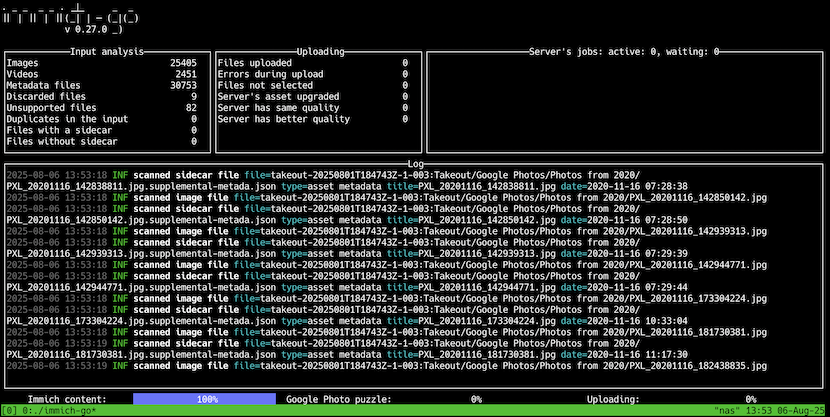
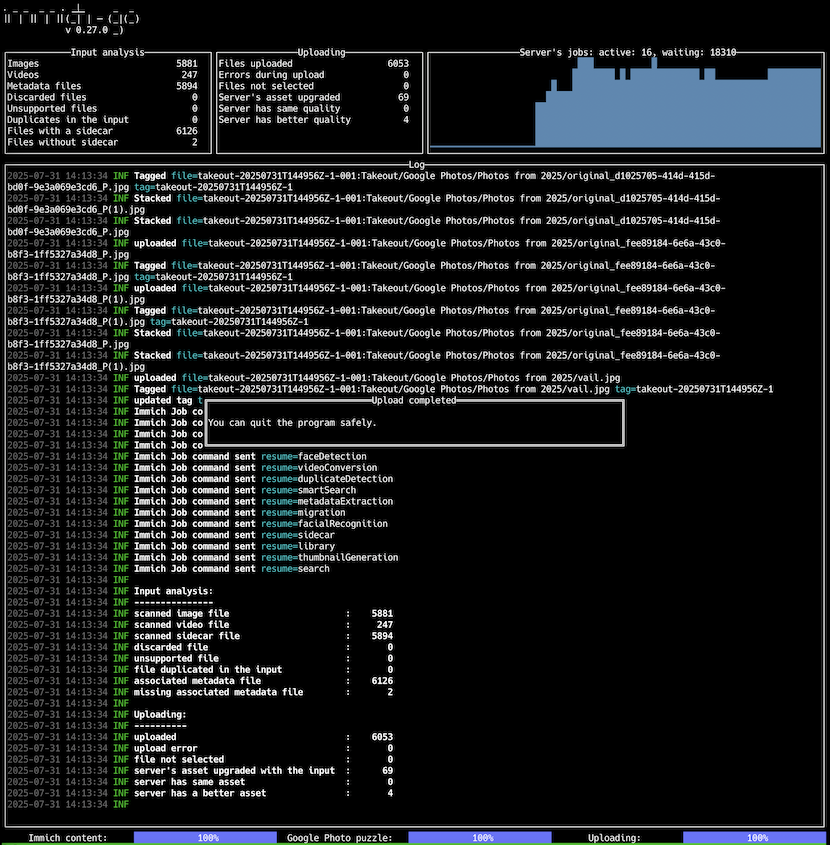
Note that the screenshots below were taken at different times in uploading, including test uploads, so you may see a difference in the number of photos
Once it starts, you'll see it processing the photos:
Eventually, you will see that the upload is finished and immich-go displays a "You can quit the program safely." message:
Check out the photos imported in the Immich server
Once the upload is complete, you can see the Immich server stats showing the imported photos:
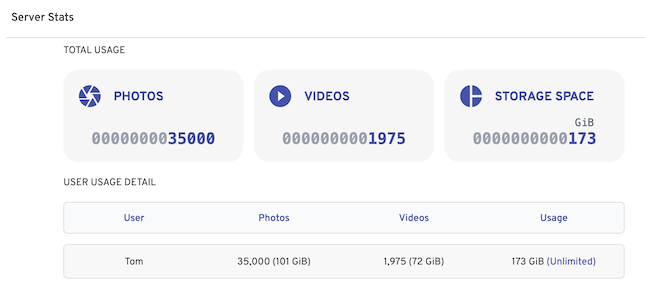
I would recommend that, depending on the size of your upload, you let Immich process all of the photos you uploaded, as it will take some time to run through the various options you configured in Immich.
In my case, I imported 35,000 photos and left it alone overnight.
References
Github / simulot / immich-go
https://github.com/simulot/immich-go
Google Takeout
https://takeout.google.com/