Import qcow2 image into Proxmox
After moving from a plain Ubuntu install to Proxmox for my home lab usage, I had one highly-customized Ubuntu server that I needed to import into Proxmox.
Doing so took a few steps, but was simple to do, once I figured out how to do it.
Create a basic virtual machine
-
General - Name is whatever you want, but note the VM ID, as we'll use this later.
-
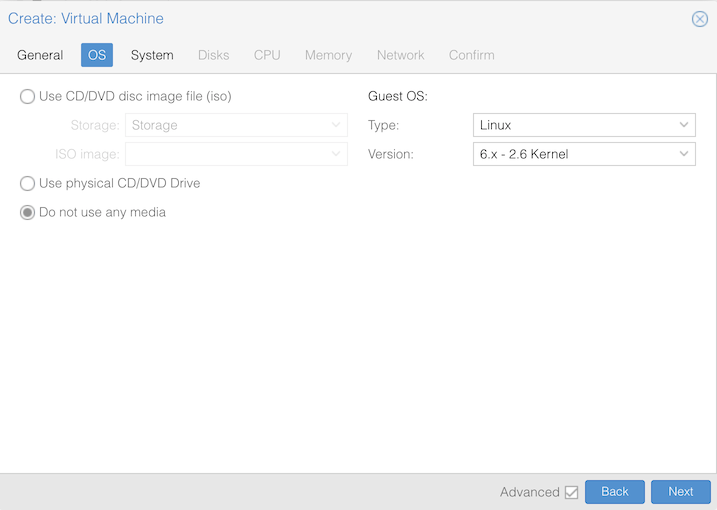
OS - Select the options for the VM OS on the right, and check Do not use any media
-
System - Configure as needed for your VM's OS (I used the defaults)
-
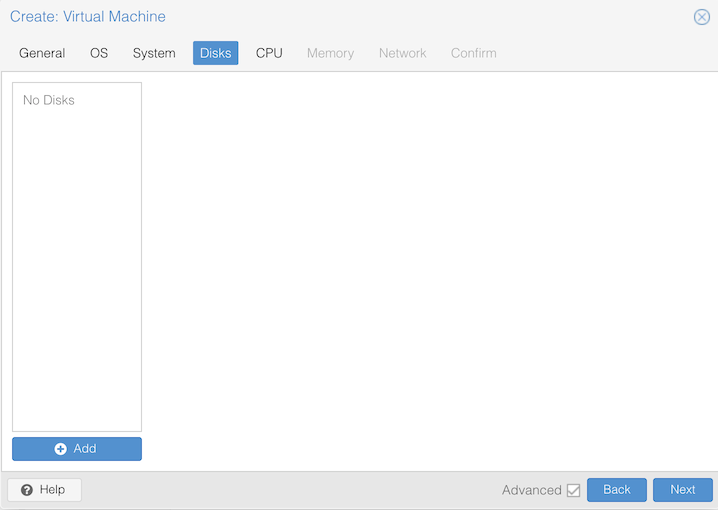
Disks - Delete the default disk (use the trashcan icon)
-
CPU - Configure as needed for VM OS
-
Memory - Configure as needed for VM OS
-
Network - Configure as needed for VM OS
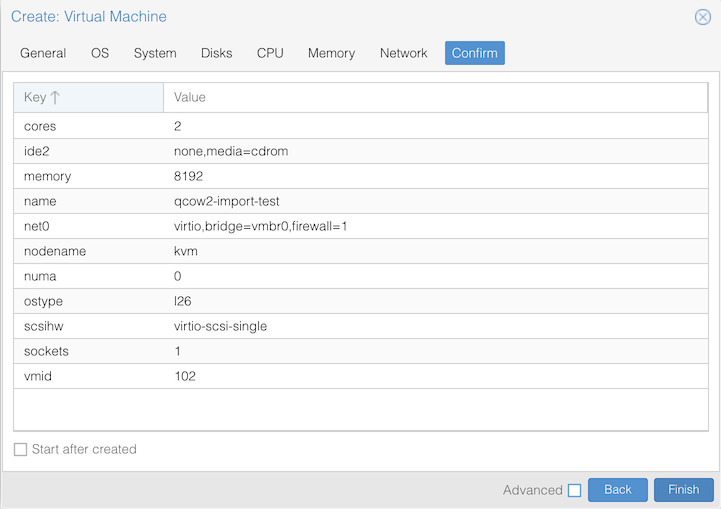
Our final VM configuration:
Import the qcow2 image into the VM
To import a qcow2 image into the virtual machine, we use the qm command, with this basic syntax:
sudo qm importdisk <VM ID> <qcow2 image> <storage name>
In this example, the VM ID is 102, the qcow2 image is /home/tom/Ubuntu.qcow2, and the name of the storage is Storage:
sudo qm importdisk 102 /home/tom/Ubuntu.qcow2 Storage
importing disk '/home/tom/Ubuntu.qcow2' to VM 102 ...
Formatting '/Storage/images/102/vm-102-disk-0.raw', fmt=raw size=53687091200 preallocation=off
transferred 0.0 B of 50.0 GiB (0.00%)
transferred 512.0 MiB of 50.0 GiB (1.00%)
transferred 1.0 GiB of 50.0 GiB (2.00%)

...

transferred 50.0 GiB of 50.0 GiB (100.00%)
Successfully imported disk as 'unused0:Storage:102/vm-102-disk-0.raw'
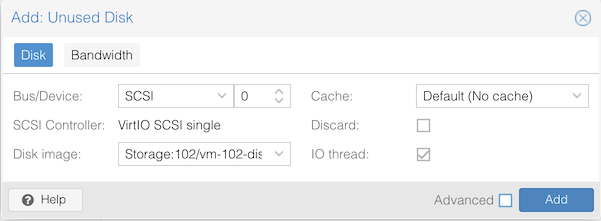
Add the newly imported disk to the VM
-
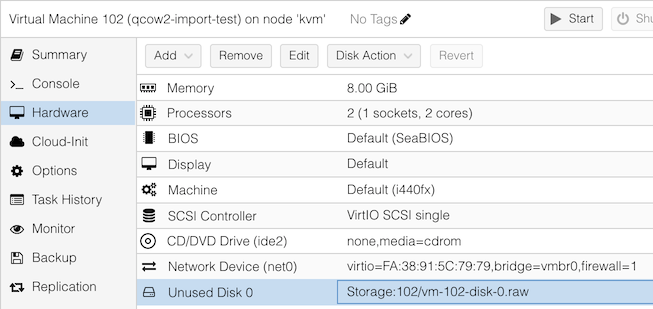
Select the VM and then Hardware, and we see the added disk listed as Unused Disk
-
Double click the Unused Disk and select Add
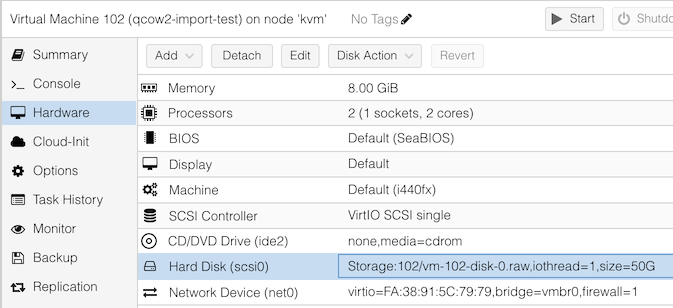
Now the imported qcow2 image has been imported and added as a disk (hard drive) for the VM
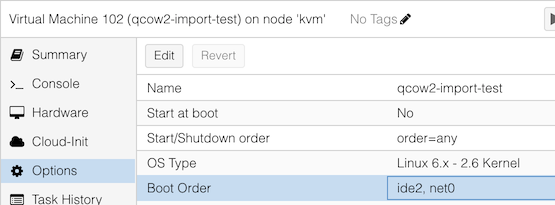
Change the boot order
-
Under Options, select Boot Order
-
Check off Enabled, and if you want to change the boot order, use the hamburger icon (on the left)
Once this is done, the qcow2 image has been imported, added to the VM, enabled, and configured to be first in the boot order.
The VM configuration is complete, and the VM can be booted/used as needed.