Ubiquiti UDM Pro as a Wireguard VPN server
I've been using Wireguard for a few months now, and the performance has been great, with zero stability issues.
I started by using a virtual machine for the Wireguard server, and once I got the configuration ironed out, then moved it to a Docker instance.
I later discovered that my Ubiquiti Ultimate Dream Machine Pro (UDM Pro), supports Wireguard, so I decided to move it from the Docker container to the UDM Pro.
I found that, at least for my network setup, a lot of the instructions provided were unnecessary, and the actual configuration was pretty simple on the UDM.
My network / setup
I have what I think is a common home network.
-
My ISP provides a modem, which is set to passthrough mode (no routing).
-
I've connected the modem to my UDP Pro's WAN port, and the UDM gets a public IP from the modem.
-
Any networks on the LAN side of the UDM are private RFC1918 addresses.
-
There are under 10 people that will be connecting to the Wireguard VPN.
-
Users that connect will either have access to all devices/resources on the network, or will be limited to only a few IPs for specific resources (Plex server, printer, file server).
Configure the UDM Pro as a Wireguard VPN server
These are the steps I used to install and configure the Wireguard VPN server
Install udm-boot
To survive reboots and firmware updates on the UDM, Boostchicken has a package, udm-boot, that can be installed to automatically run a shell script(s) at S95 anytime your UDM starts / reboots.
-
SSH into your UDM Pro
-
Switch to the UniFi shell
unifi-os shell -
Download the boot scripts:
curl -L https://udm-boot.boostchicken.dev -o udm-boot_1.0.5_all.deb -
Install the boot scripts:
dpkg -i udm-boot_1.0.5_all.deb -
Exit out of the UniFi shell (this is important!):
exit
Install Wireguard on the UDM
- Download the tar file:
curl -LJo wireguard-kmod.tar.Z https://github.com/tusc/wireguard-kmod/releases/download/v01-22-22/wireguard-kmod-01-22-22.tar.Z
Always check this link for the latest release.
-
Extract the files to /mnt/data/:
tar -C /mnt/data -xvzf wireguard-kmod.tar.Z -
Make the setup_wireguard.sh script executable:
chmod +x /mnt/data/wireguard/setup_wireguard.sh -
In the setup_wireguard.sh script, make sure LOAD_BUILTIN is set to 0 to force loading the external (and usually more up to date) kernel module:
grep "^LOAD_BUILTIN" /mnt/data/wireguard/setup_wireshark.sh LOAD_BUILTIN=0 -
Run the setup_wireguard.sh script:
/mnt/data/wireguard/setup_wireguard.sh
Running the setup_wireguard.sh script setups up the symbolic links for the various binaries to the /usr/bin path as well as create a symlink for the /etc/wireguard folder and finally load the kernel module.
-
Verify the kernel module loaded:
dmesg
[   34.033392] wireguard: WireGuard 1.0.20211208 loaded. See www.wireguard.com for information.
[   34.033396] wireguard: Copyright (C) 2015-2019 Jason A. Donenfeld <Jason@zx2c4.com>. All Rights Reserved.
Configure Wireguard to survive reboots/firmware upgrades
cp /etc/wireguard/setup_wireguard.sh /mnt/data/on_boot.d/
Configure Wireguard to bring up the wg0 tunnel on boot
echo "wg-quick up wg0" >> /mnt/data/on_boot.d/setup_wireguard.sh
Generate the Wireguard server's public/private keys
cd /etc/wireguard
wg genkey | tee privatekey | wg pubkey > publickey
Create the Wireguard server's configuration file in /etc/wireguard/wg0.conf
[Interface]
Address = 10.0.0.1/24
SaveConfig = true
PrivateKey = <server's privatekey>
ListenPort = 51820

[Peer]
PublicKey = <client's publickey>
AllowedIPs = 10.0.0.2/32
Client configuration file
If you've made it this far, you know how to create a client's private/public keys, and the resulting configuration will look like this:
[Interface]
Address = 10.0.0.2
PrivateKey = <client's privatekey>

[Peer]
PublicKey = <server's publickey>
Endpoint = <server's ip>:51820
AllowedIPs = 0.0.0.0/0
# This is for if you're behind a NAT and
# want the connection to be kept alive.
PersistentKeepalive = 25
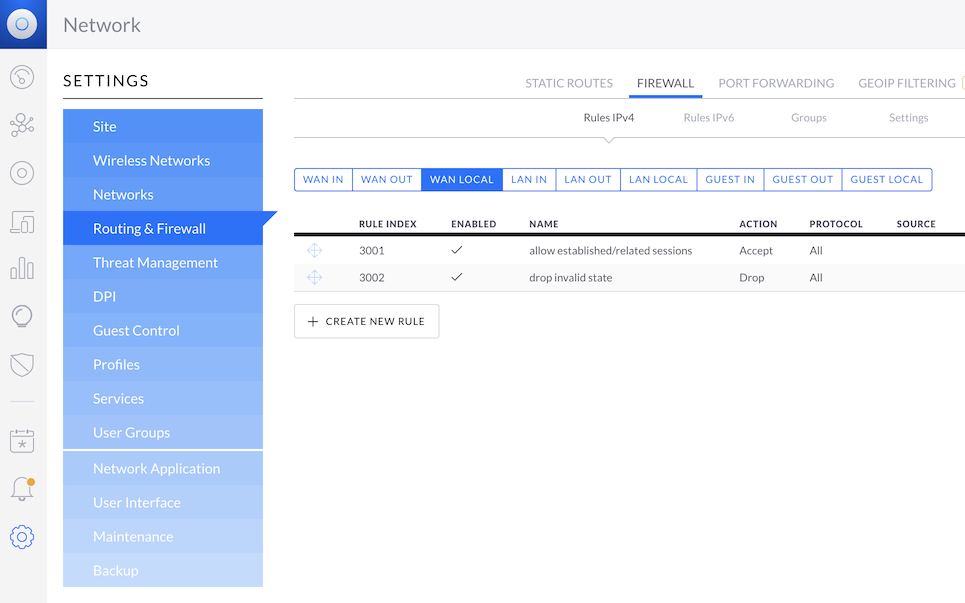
Configure the UDM to allow Wireguard through the firewall
This needs to be a WAN LOCAL rule, or it won't work correctly.
Using the Legacy UI web GUI:
Settings --> Routing & Firewall --> Firewall --> WAN LOCAL --> + CREATE NEW RULE
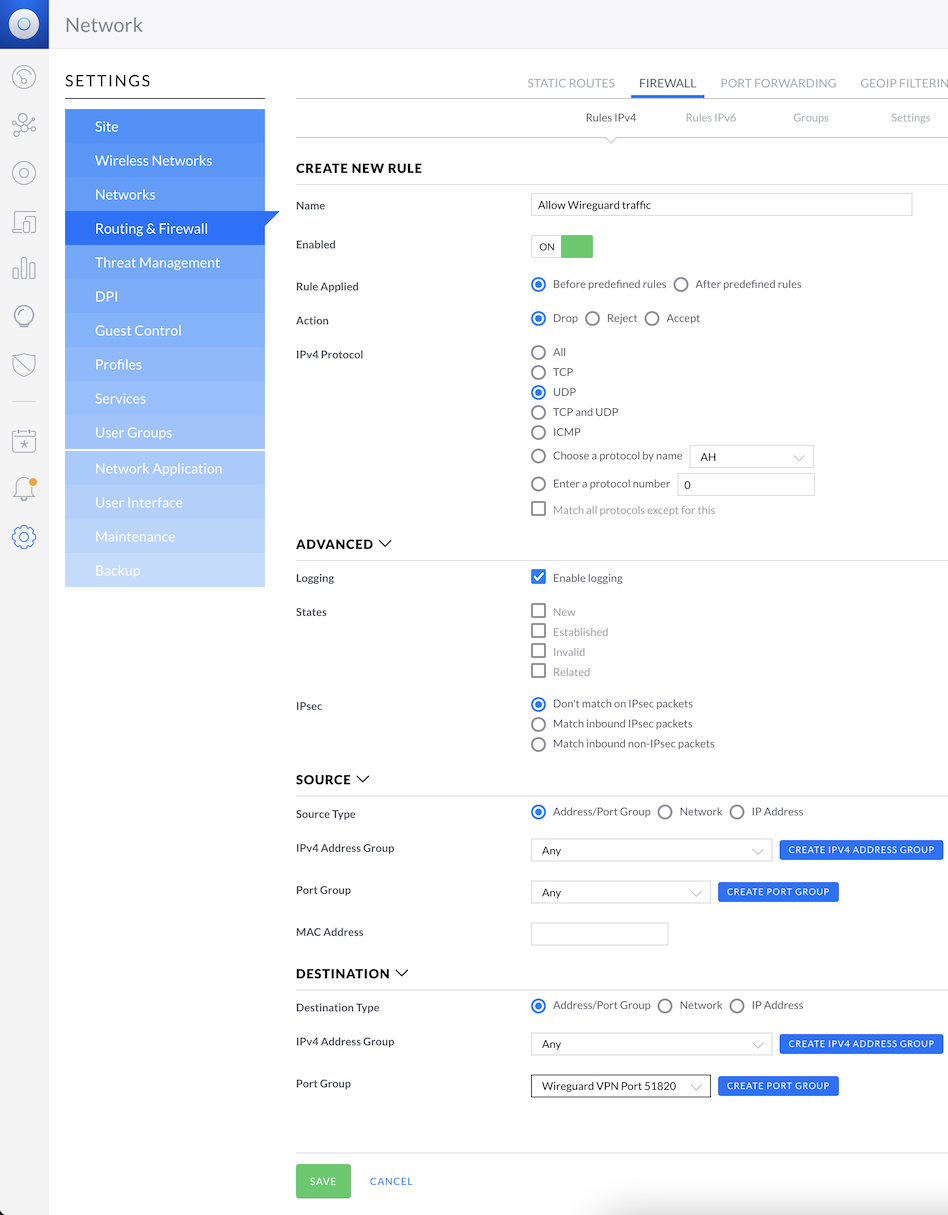
Rule details
- Name: Allow Wireguard traffic
- Enabled: ON
- Rule Applied: Before predefined rules
- Action: Accept
- IPv4 Protocol: UDP
- Logging: Enable logging
- Source:
- IPv4 Address Group: Any
- Port Group: Any
- Destination:
- IPv4 Address Group: Any
- Port Group: Select CREATE PORT GROUP and add your Wireguard server's listen port (51820 by default)
Then hit SAVE
Bring up the Wireguard VPN tunnel
wg-quick up wg0
Verify tunnel
wg
interface: wg0
  public key: aLlio2gTVZts3wTqjl25t4Gs+lRKTnxU+fS3RTnYxG0
  private key: (hidden)
  listening port: 51820

peer: iI48ujukCjfau3jYVBx/90Br0FEIXfnaGkOsi0r8UFI=
  endpoint: 174.215.8.3:56551
  allowed ips: 10.0.0.2/32

peer: MAwY7FAyLzaNK2pOyKtX1VrFHyFbIY1fiWM/wUnrLWg=
  allowed ips: 10.0.0.3/32
References
github - tusc / wireguard-kmod https://github.com/tusc/wireguard-kmod
github - boostchicken-dev / udm-utilities https://github.com/boostchicken-dev/udm-utilities/tree/master/on-boot-script