Enabling KVM host to virtual machine communication
Virtual machines (VM) and their KVM host can't communicate over the network, which is by design.
There are times however, that I want to enable VM to KVM host communication, typically because the KVM host is hosting something else I want to access from the VM..
The two ways of doing this, along with the pros and cons:
-
Create a macvlan interface on the KVM host, then use that interface instead of eno1 (or eth0, etc) for the VMs.
Pros:
- Nothing to configure on the VMs, and they'll work right out of the box.
Cons:
- Doesn't play nicely with Ubuntu's NetworkManager.
- Enables all VMs to access the host.
-
Create an isolated network on the KVM host, and add an interface on the VM, associated with that isolated network.
Pros:
- You can pick and choose which VM(s) to enable KVM host to VM communication.
Cons:
- Requires adding an additional interface to the VM.
This variant provides a completely isolated private network for guests. The guests can talk to each other, and the host OS, . . .
I went with the option #2, as I don't want all my VMs having access to the KVM host.
Default behavior
IP of the KVM host: 192.168.1.15 IP of the VM guest: 192.168.1.174
Attempting to ping from the VM to the KVM host fails:
ping -c3 192.168.1.15
PING 192.168.1.15 (192.168.1.15) 56(84) bytes of data.
From 192.168.1.174 icmp_seq=1 Destination Host Unreachable
From 192.168.1.174 icmp_seq=2 Destination Host Unreachable
From 192.168.1.174 icmp_seq=3 Destination Host Unreachable

--- 192.168.1.15 ping statistics ---
3 packets transmitted, 0 received, +3 errors, 100% packet loss, time 2030ms
At this point, we have enp1s0 and lo loopback interfaces on the VM:
ifconfig
enp1s0: flags=4163<UP,BROADCAST,RUNNING,MULTICAST>  mtu 1500
        inet 192.168.1.174  netmask 255.255.255.0  broadcast 192.168.1.255
        inet6 fe80::5054:ff:fe9e:b99b  prefixlen 64  scopeid 0x20<link>
        ether 52:54:00:9e:b9:9b  txqueuelen 1000  (Ethernet)
        RX packets 2706  bytes 268962 (268.9 KB)
        RX errors 0  dropped 61  overruns 0  frame 0
        TX packets 1189  bytes 1512827 (1.5 MB)
        TX errors 0  dropped 0 overruns 0  carrier 0  collisions 0

lo: flags=73<UP,LOOPBACK,RUNNING>  mtu 65536
        inet 127.0.0.1  netmask 255.0.0.0
        inet6 ::1  prefixlen 128  scopeid 0x10<host>
        loop  txqueuelen 1000  (Local Loopback)
        RX packets 180  bytes 14304 (14.3 KB)
        RX errors 0  dropped 0  overruns 0  frame 0
        TX packets 180  bytes 14304 (14.3 KB)
        TX errors 0  dropped 0 overruns 0  carrier 0  collisions 0
Create the isolated network
There are three ways of creating the isolated network:
- Using the virt-manager GUI.
- Using the webvirtcloud web GUI.
- Using the virsh commands from the console.
Using virt-manager
-
On the KVM host, create a new virtual network, ensuring that it's mode is isolated:
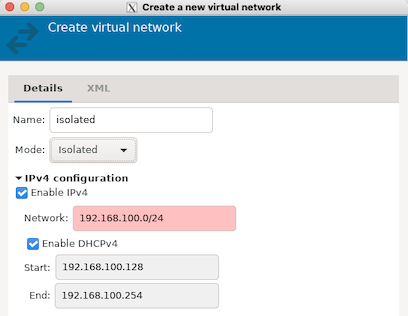
You can use the default IPv4 configuration, or choose your own.
-
In
virt-manager, open the VM, select Add Hardware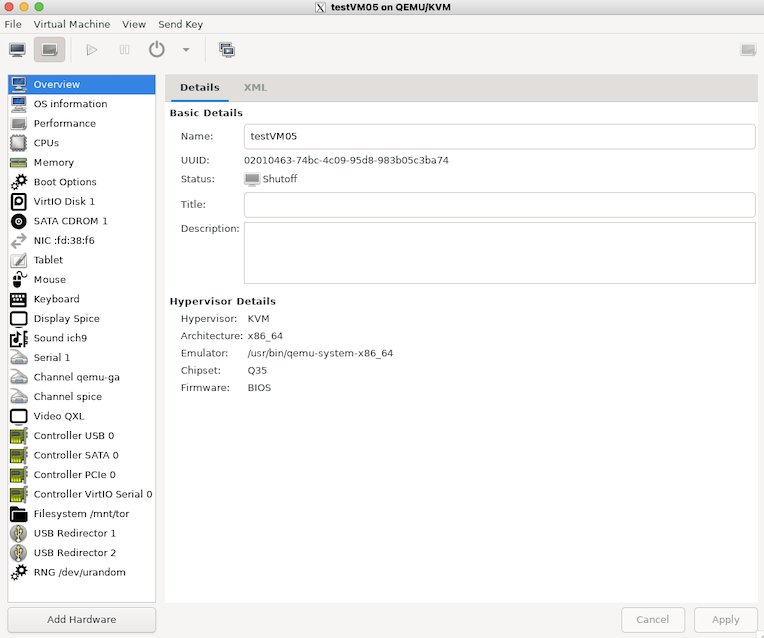
-
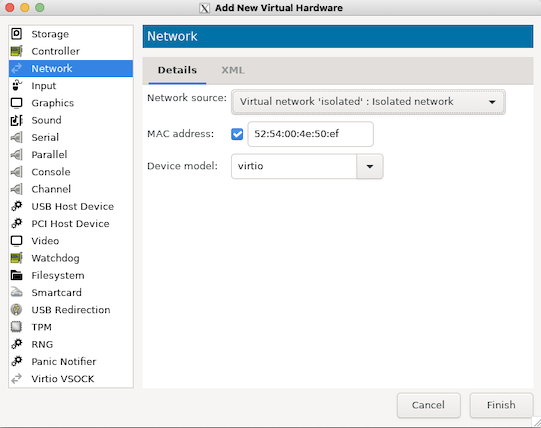
Add new Network device, and under the Network Source, select the isolated network:
Using webvirtcloud
-
Log into webvirtcloud
-
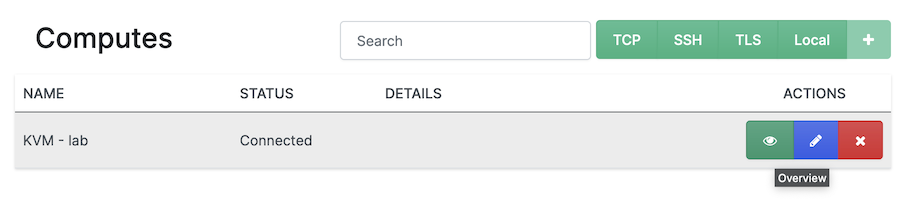
Click on Computes, then select the Overview icon (looks like an eye).
-
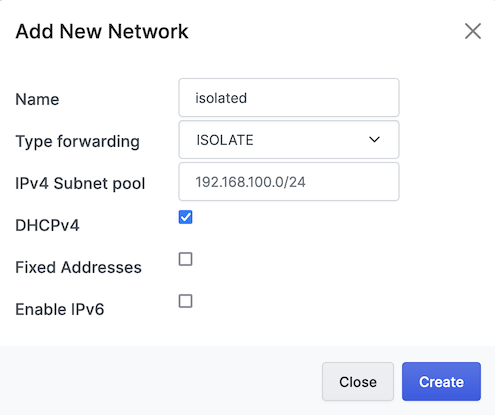
Select Networks, then click the
+in the upper right hand corner.Settings:
- Name: isolated
- Type forwarding: ISOLATE
- IPv4 Subnet pool: 192.168.100.0/24
- DHCPv4: checked
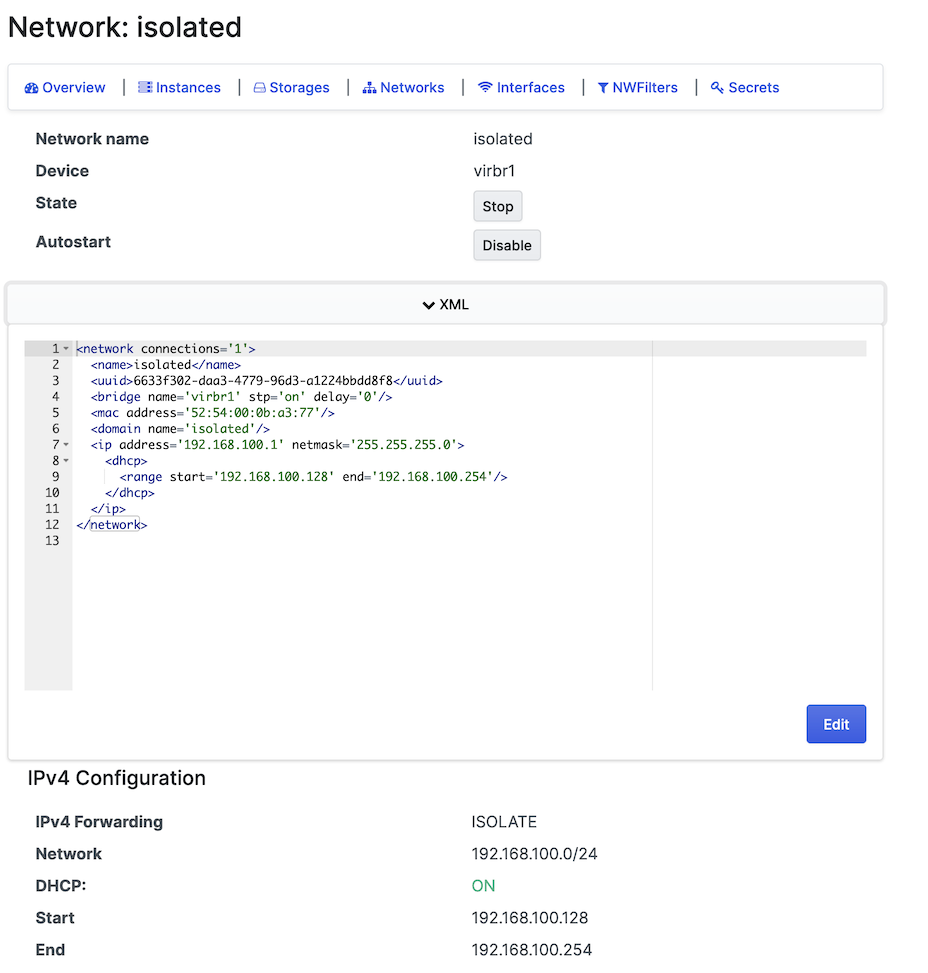
After completing the network configurations, the final result will look like this:
-
Add new isolated network to a VM:
-
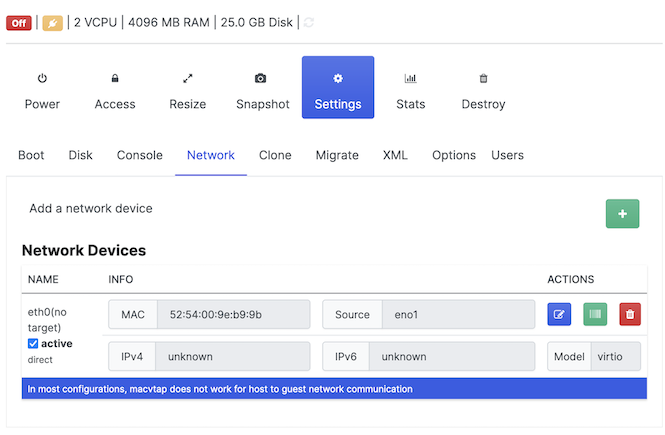
Select Instances, then select the name of the VM, which will bring details about the VM.
-
Go to Settings, then Network, and add a new interface by clicking the
+sign:
-
-
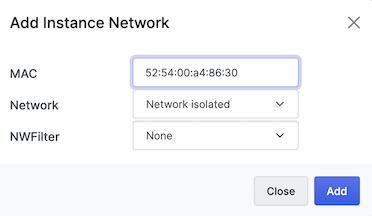
For the Network, make sure you select the isolated network:
Using virsh commands
-
Example network XML file, called isolated-net.xml:
<network> <name>isolated</name> <bridge name='virbr1'/> <ip address='192.168.100.1' netmask='255.255.255.0'> <dhcp> <range start='192.168.100.128' end='192.168.100.254'/> </dhcp> </ip> </network> -
Then create the new network:
virsh net-define ./isolated-net.xml
Network isolated3 defined from ./isolated-net.xml
We use
net-defineinstead ofnet-createso we get a persistent virtual network. Usingnet-createonly creates a transient virtual network that will disappear when the KVM host is rebooted. -
Configure the new isolated network to autostart:
virsh net-autostart isolated Network isolated marked as autostarted -
Displaying all configured networks:
virsh net-list Name State Autostart Persistent ---------------------------------------------- default active yes yes isolated active yes yes -
After creation, we can view the XLM of the network by running
virsh net-dumpxml isolatedvirsh net-dumpxml isolated <network connections='1'> <name>isolated</name> <uuid>6633f302-daa3-4779-96d3-a1224bbdd8f8</uuid> <bridge name='virbr1' stp='on' delay='0'/> <mac address='52:54:00:0b:a3:77'/> <domain name='isolated'/> <ip address='192.168.100.1' netmask='255.255.255.0'> <dhcp> <range start='192.168.100.128' end='192.168.100.254'/> </dhcp> </ip> </network>virsh net-info isolated Name: isolated UUID: 6633f302-daa3-4779-96d3-a1224bbdd8f8 Active: yes Persistent: yes Autostart: yes Bridge: virbr1 -
Add the new isolated network to the VM (testVM):
virsh attach-interface --domain testVM --type network --source isolated --model virtio --current- Details of above command:
--domain- Name of the VM--type- Network (possible options are network, bridge, direct, hostdev, vhostuser)--source- Name of the network to attach the interface to, in this case our isolated network--model- Driver to use for the interface--current- Applied to the current VM state, running or not
- Details of above command:
New network information
No matter how you add the interface, you'll need to configure the new network interface.
In Ubuntu, we do this by adding the new interface to the netplan config file (/etc/netplan/00-installer-config.yaml in Ubuntu 20.04).
Example /etc/netplan/00-installer-config.yaml file adding the new enp6s0 interface:
# This is the network config written by 'subiquity'
network:
  ethernets:
    enp1s0:
      dhcp4: true
    enp6s0:
      dhcp4: true
  version: 2
After booting the VM, if we check the interfaces via the ifconfig command, we see a new interface enp6s0, with an IP of 192.168.100.130:
ifconfig enp6s0
enp6s0: flags=4163<UP,BROADCAST,RUNNING,MULTICAST>  mtu 1500
        inet 192.168.100.130  netmask 255.255.255.0  broadcast 192.168.100.255
        inet6 fe80::5054:ff:fea4:8630  prefixlen 64  scopeid 0x20<link>
        ether 52:54:00:a4:86:30  txqueuelen 1000  (Ethernet)
        RX packets 1801  bytes 99872 (99.8 KB)
        RX errors 0  dropped 1626  overruns 0  frame 0
        TX packets 174  bytes 15395 (15.3 KB)
        TX errors 0  dropped 0 overruns 0  carrier 0  collisions 0
On our VM, the interface assigned to the isolated network has an IP of 192.168.100.130, and the KVM host has an interface assigned to the isolated network, with an IP of 192.168.100.1.
Now the VM and KVM host can communicate, using the 192.168.100.x network.
From the VM:
ping -c3 192.168.100.1
PING 192.168.100.1 (192.168.100.1) 56(84) bytes of data.
64 bytes from 192.168.100.1: icmp_seq=1 ttl=64 time=0.264 ms
64 bytes from 192.168.100.1: icmp_seq=2 ttl=64 time=0.288 ms
64 bytes from 192.168.100.1: icmp_seq=3 ttl=64 time=0.294 ms

--- 192.168.100.1 ping statistics ---
3 packets transmitted, 3 received, 0% packet loss, time 2052ms
rtt min/avg/max/mdev = 0.264/0.282/0.294/0.013 ms
References
libvirt.org - wiki - Guest can reach outside network, but can't reach host (macvtap) https://wiki.libvirt.org/page/Guest_can_reach_outside_network%2C_but_can't_reach_host_%28macvtap%29
Furor Teutonicus - Enabling host-guest networking with KVM, Macvlan and Macvtap https://www.furorteutonicus.eu/2013/08/04/enabling-host-guest-networking-with-kvm-macvlan-and-macvtap/
libvirt.org - VirtualNetworking https://wiki.libvirt.org/page/VirtualNetworking
libvirt.org - Network XML format - Isolated network config https://libvirt.org/formatnetwork.html#examplesPrivate
libvirt.org - Virsh Command Reference - net-dumpxml https://libvirt.org/sources/virshcmdref/html/sect-net-dumpxml.html