Webvirtcloud in a Docker container with persisted data
I was using Webvirtcloud install on my KVM device, but decided to switch to a Docker container, as I've been trying to move as much as possible to Docker, for the sake of simplicity, and easier recovery if/when something goes wrong.
The install was easy, but there were a few commands that had to be run as a different user (www-data) from within the Docker container, to get the SSH part working correctly.
The webvirtcloud Docker container is pretty easy to deploy and configure, but to get the most out of it being a Docker container, I wanted persistent data across deployments, so I wouldn't have to run through the same steps again.
In this example, we are keeping the persistent data on the Docker host in /home/tom/wvc_persist/.
Pre-install requirements
-
If not already installed, install
gitandpython:sudo apt install git python -y -
On the Docker host, create the directory for our persistent data:
mkdir /home/tom/wvc_persist
Clone the repository and configure the application
-
Clone the repro:
git clone https://github.com/retspen/webvirtcloud.git -
Copy the settings template file:
cd webvirtcloudcp webvirtcloud/settings.py.template webvirtcloud/settings.py -
Generate a random secret:
python3 conf/runit/secret_generator.py )7&{ES|MY9,)woJU-*:7u5)V1a*]1CykC\G:FU+>ml8Em%Df-X -
One thing to check is for the existence of the
secret_generator.pyfile doesn't generate a double quote"as part of the random string.If it does, we'll get more than 2 double quotes in the file, and the service will puke.
To check that there are only 2 double quotes:
grep "SECRET_KEY" webvirtcloud/settings.py | awk -F\" '{print NF-1}' 2 -
Copy the code from the
secret_generator.pyscript and edit the SECRET_KEY line in the webvirtcloud/settings.py file. -
Or use this one-liner, from within the webvirtcloud directory:
sed -i "s/SECRET_KEY \= \"\"/SECRET_KEY = \"$(python3 conf/runit/secret_generator.py)\"/" webvirtcloud/settings.py
Build, then run the container
The first time we build the container, we'll use docker run, instead of a docker-compose file, as we need the DB created.
If we try to create the DB as part of the container build, it doesn't get written to.
After the initial creation, we can use docker-compose in the future, and keep our persistent data.
In this example:
-
Container name: webvirtcloud
-
KVM host IP: 192.168.1.15
-
Username on the KVM host: tom
-
Location of persistent data on the KVM host: /home/tom/wvc_persist/
-
Build the container:
docker build -t retspen/webvirtcloud:1 .docker run -d --restart unless-stopped --name webvirtcloud -p 80:80 -p 6080:6080 -v '/home/tom/wvc_persist/ssh:/var/www/.ssh' retspen/webvirtcloud:1If we wanted to change the port we connect to from port 80 to something else, such as 8080, we would run:
docker run -d --restart unless-stopped --name webvirtcloud -p 8080:80 -p 6080:6080 -v '/home/tom/wvc_persist/ssh:/var/www/.ssh' retspen/webvirtcloud:1Note: Docker will create a directory if the specified mount doesn't exist, so we can specify the DB file (yet).
Generate SSH keys and establish communication
To avoid a Host key verifcation failed message when adding a KVM target system ("Computes" > "SSH Connection") to webvirtcloud:
-
Create private/public SSH keys on the webvirtcloud container
-
Use
ssh-copy-idto copy the key to the KVM host and to add the KVM host to the .ssh/known_hosts file. -
Verify SSH key-less connectivity between the webvirtcloud container and the KVM host.
-
Connect to the Webvirtcloud container:
docker exec -it webvirtcloud /bin/bash -
From within the Docker container, change the owner of the .ssh directory, and the db.sqlite3 file to the www-data user:
chown www-data -R ~www-data/.ssh/chown www-data /srv/webvirtcloud/db.sqlite3 -
Still within the Docker container:
- Use Docker's
setusercommand to create a SSH key pair - Use
ssh-copy-idto copy the public key to the KVM (192.168.1.15) - Verify that the
ssh-copy-idworked by ssh'ing into the KVM
setuser www-data ssh-keygen -f ~www-data/.ssh/id_rsa -q -N ""setuser www-data ssh-copy-id tom@192.168.1.15If you have multiple KVM hosts you want to administer with webvirtcloud, you'll need to run the
ssh-copy-idfor each one. - Use Docker's
-
Verify that we can SSH into the KVM without a password:
setuser www-data ssh -t tom@192.168.1.15 'whoami;exit'
tom
Connection to 192.168.1.15 closed.
We use the
-tand'whoami;exit'with the SSH command to make the commands easier to copy and paste.
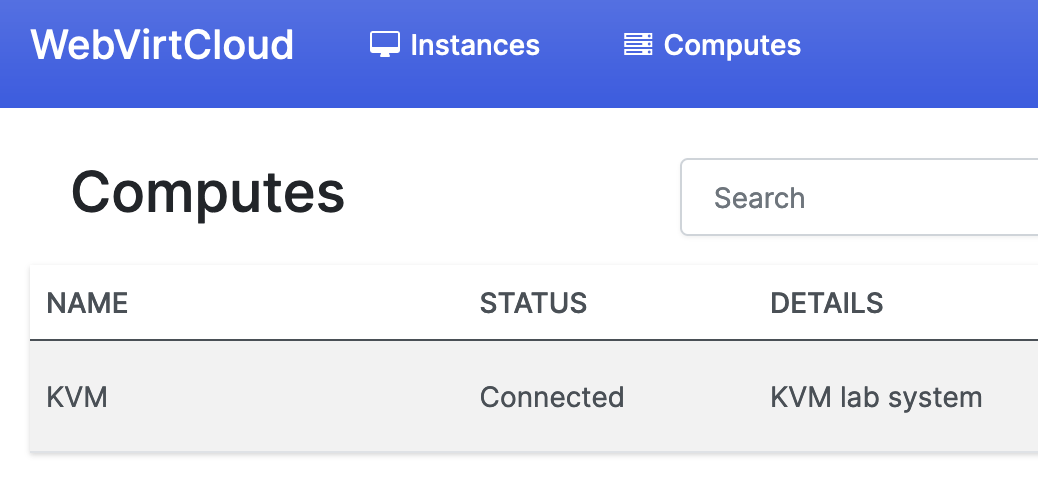
At this point, we can go to http://192.168.1.15/ and add the KVM system under Computes.
Persistent data
-
On the Docker host, the /home/tom/wvc_persist/ directory will contain the persisted data:
- The db.sqlite3 (/home/tom/wvc_persist/db.sqlite3)
- The .ssh directory, which will contain the SSH keys and known_hosts file (/home/tom/wvc_persist/ssh/
-
After the original webvirtcloud deployment, and after you've configured it (users, computes, instances, etc), we'll need to copy the db.sqlite3 file from the Docker container, to the Docker host:
# setuser www-data scp /srv/webvirtcloud/db.sqlite3 tom@192.168.1.15:/home/tom/wvc_persist/ -
To use it in webvirtcloud, we need to change the ownership of the db.sqlite3 file on the Docker host:
sudo chown www-data /home/tom/wvc_persist/db.sqlite3 -
We can now deploy a webvirtcloud Docker container, using the persisted data.
Deploy webvirtcloud container with persistent data
-
Stop and delete the original webvirtcloud container:
docker stop webvirtcloudshell {.command} docker rm webvirtcloud
-
Our webvirtcloud.yaml file to use with
docker-compose:version: '3.3' services: webvirtcloud: restart: unless-stopped container_name: webvirtcloud ports: - '80:80' - '6080:6080' volumes: - '/home/tom/wvc_persist/db.sqlite3:/srv/webvirtcloud/db.sqlite3' - '/home/tom/wvc_persist/ssh:/var/www/.ssh' image: retspen/webvirtcloud:1While the official Docker documentation tells you not to mount files, only directories, the above syntax works.
-
Deploy webvirtcloud using
docker-composewith persistent data:docker-compose -f ./webvirtcloud.yaml up -d -
After logging in, the Compute server(s) you set up previously should still show up, without needing to be configured.
References
Github - retspen / webvirtcloud https://github.com/retspen/webvirtcloud/wiki/Docker-Installation-&-Update
Github - retspen / webvirtcloud https://github.com/retspen/webvirtcloud#configuring-compute-ssh-connection
Github - kenmlee / webvirtcloud-docker https://github.com/kenmlee/webvirtcloud-docker/blob/master/docker-compose.yml